Wednesday, November 3, 2021

Stenciled Bouquet


Sorry I have not posted much this week but I was busy making cards to send off for a possible publication some day and so did not post any of them at all. But here is one I did make using an Altenew stencil, some sentiment stamps and sequins which also came from Altenew. I used two shades of ink one in a light pink and one in a darker pink. And, I used sentiments on the card that  would work for any type of celebration.


I could have gone just with the stencil design alone but in the end I decided I wanted some gold washi tape and some gold sequins on the card. I thought it gave that little extra elegant look to the monochrome design. I am happy with it and think myself it is beautiful! And the stencil was perfect for a larger slimline design!

Altenew products: Watercolor Bouquet Stencil, Celebrate Mini Stamp Set and Gold Washi Tape and Sequins.

Today I was going to work with some digitals so I put in new ink cartridges and lo and behold no matter how I put the colored one in the colored ink would not print. So I called the computer store and they said to bring in the printer. So it is now in the shop. I hope it doesn't mean a new printer is needed. I guess time will tell what the results will be. One bad thing about digitals is that you need your technical equipment working right too! 

Well, I do have ink pads and stamps I can work with. I also won a $15 gift certificate to Altenew so I spent some time this morning shopping and of course, went over the amount big time. Will I ever learn? Answer: I doubt it. LOL

Also this week I got my Christmas gifts for the grandkids (younger ones) ordered and some are even wrapped already. The older ones will get money so they can spend it any way they want. I visited with my son in Japan via texting and we came to the conclusion it is too spendy to send them a package. So I will go with money for them too and I guess Japan doesn't want large packages either at this time. When the family finally makes it back to the US they can spend it here.

Anyway I have had a busy week. I hope all of you are doing well too! I appreciate your comments. Also I have been commenting on any posts of yours that I get in my feeds. Someone said they had not seen any comments from me but I assure you I have been leaving them. For some reason perhaps they have not allowed mine to go through. If such is the case I can do nothing about it that I know of.

Take care and God bless, Verna


Monday, October 25, 2021

Die Cut Layered Daisy

I love the look of layered flowers and images and so when I saw this Altenew Craft-A-Flower:Daisy Layering Die Set I had to buy it and see if I liked working with die cuts as well as I do the layering stamps and stencils. Well, although the end result is beautiful I found that for me with my arthritic hands they would not work well with the small pieces. But I struggled and did finally get my card to sort of look okay. So my concensus is that I will not buy the die cut sets but will continue to buy the stamps and stencils. I must say my favorite is the stencils too. They were much easier to line up.


I started out with white card stock for all the die cut layers. I then used ink pads to color in the various colors. The white daisy I simply added a bit of light blue to the layers but not so heavy as to have them look blue but still maintain the white. The pink daisy was colored in with various shades of pink to create my layered look. And the leaves were with various shades of green ink added to the layers. The same with the centers of the daisies to which shades of brown were used. Those centers were where it was so hard for me to layer together as they were too small for my clumsy hands. 

The sentiment is from one of my favorite Altenew sets called Beautiful Day. I am sending this one out to my niece who is now in remission from her Pancreatic cancer. I so hope she stays that way for a long, long time too. She has gotten well enough that she can resume her job. I am so glad as I know this has been an expensive ordeal for the family with her having to go to treatments. 

Well, thanks for all the sweet comments which make my day. You are so good to me.

God bless, Verna

October Rudolph Days

My card for this challenge is made with all Stamplorations product lines. That includes the stencil for the background, the ATC ephemera card and the sentiment sticker. As you can tell I love the paper line from them which allows for quick and easy card designs. I am entering this in the October Rudolph Days Challenge.


Using the stencil I tried to get about the same pattern as was on the ATC. Although not perfect I do think it still ties them together and I liked it so that was what really counted. Haha! And, those stickers have such wonderful sayings so I chose to add one to the card front and also inside the card. The card stock used for the card base and the layer though is from Gina K. Designs.

Thanks for visiting and I wish all of you a great week. 

God bless, Verna

Friday, October 22, 2021

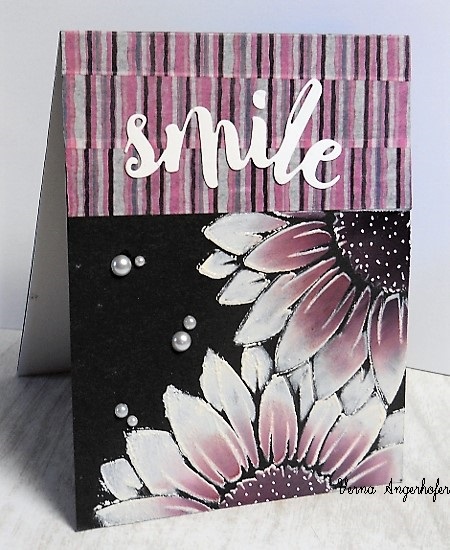
Peeking Sunflowers

Once again I had to use the stencil called Peeking Sunflowers from Stamplorations. It is in the Artplorations division. And the colors I used were supposed to resemble one of the images on the mood board at Double D's Challenge which is Sunflowers. So without further ado here is the card I created and tried to capture fairly close the colors on the board.


For this card I stenciled in the sunflowers with white pigment ink on black card stock. And, then I overlapped with some mixes of deep reds and purples to create the flowers with a bit of color. The next step was to add some Gina K. Designs clear embossing powder and heat set it. Well, of course, when I did the stenciled design I got some white ink outside of the stencil onto the black card base so I had to find a way to cover that up. So to the rescue was some Washi tape from Altenew which I thought was a fairly close match to the colors. The sentiment die is from the Cutplorations division of Artplorations and the finishing touches were some white pearls and some Posco white paint marks in the sunflower centers.

I lined the inside of the card with white paper so that I could stamp or write a message when I am ready to send it off. And, that was my card. Below is the photo of the mood board. This way you can see why I chose to try this color combo for it.


This was supposed to be done yesterday but instead we entertained insurance salesmen for over two hours in the afternoon. They had to review our coverage. So by the time they left I was no longer in the mood to make a card.

Well everyone thanks so much for the visits. I wish I could respond individually to each of you but a group thanks will have to do. I love the comments you leave me too.

Until next time God bless, Verna


Wednesday, October 20, 2021

Slimline Sunflower Card

I haven't been joining in many challenges lately because if I win a gift certificate I can't seem to curb myself to just that amount but instead buy a lot more. I love buying more but to tell the truth I am running out of room so I figured I best not tempt myself. But when I saw the Double D Challenges theme was Sunflowers I just had to join in with a card I made using an Artplorations Sunflower Stencil and a Cutplorations die which are all part of Stamplorations. I used inks from Rubbernecker to add the colors with a blending brush. I just love this stencil and I had so much fun. And that is a wonderful sentiment especially this time of Thanksgiving. But it works all year long as far as I am concerned.


I took a marker and with a little darker brown I tried to add some texture to the centers of each sunflower. I thought it might bring a little more realistic look to them.

Thanks for stopping by on this rainy day. And, it is to really get cold I hear and we may be having a hard freeze in the next few nights. They even mentioned that word SNOW! Not sure I am ready for that unless it falls and disappears right away. Anyway, everyone take care.

God bless, Verna

Tuesday, October 19, 2021

Digital Cards

Yesterday I played with some digitals and used one little daisy design and merged three of them together to make one big cluster of daisies. I had to turn some of them around in different directions to make the design and what was an experiment turned out quite well I think. I then printed that merged design out and divided it into four panels. I had intended to use them just as card fronts but when I saw them this morning I decided to use them with a little extra embellishment and layers. Below is the four card panels before I made them into cards. You can see where together they made a huge cluster of flowers.


The daisy design is from Jan's Digtal Pumpkin Blessings set and the Thinkng of You sentiment is from Jan's Wild Blossom's set. The birthday cards sentiment is from the Artsystamper Artsy Sentiments set. I think it is nice when one can use digitals from more then one company to create a design.

And here is the four cards I made this afternoon with those fronts. 


I used a stitched rectangle die from Maker's Movement on a couple and on another I used a rounded corner rectangle die from My Favorite Things. The one with the fancy corners uses a die from Cheery Lynn Designs. And the one card I just used the panel as a plain card front to which I added it to a card base. The gems used were from my stash. Oh, and again the green was yellow so I had to add some green color in with marker to make it look like leaves and stems should. The card stock used is all from Gina K. Designs.

I am showing you a card I posted a few weeks ago where I only used one of the daisy clusters. This way you can see what the cluster looked like before I did the merging.


Well that is it for me today. My hubby and I are celebrating our 52nd wedding anniversary today. We exchanged cards and maybe on the weekend we will get a meal to celebrate further. Big celebrations are not on the "to do" list anymore as we are getting older (the spirit is willing but the flesh is weak) and with the still active Covid spread going on it is best not to do too much group gathering. 

Everyone take card and thanks for visiting. 

God bless, Verna

Friday, October 15, 2021

More Monochrome

Well here I am again which surprised me as I had no plans to get creative but yesterday when I did a momochrome card I had so much fun that when I looked at the card this morning it inspired me to do even more designs today. Again I used all Altenew products except maybe for some paper, ink and rhinestones.

Here is the first card I made using Gina K. Designs lipstick cardstock and then an Altenew 3D Blossoming Branches embossing folder which was inked up with a darker shade of red. I then die cut it and then added it to a white card base. Last thing I did was use a white Posca paint pen to add some interest in the flower centers and bird and the sentiment from the Altenew Watercolor Halftone stamp set..


The next card I made in monochrome blue. The Altenew stamp set used for the flowers was from the Watercolor Halftone stamp set. I also used the matching die for the set to cut out the design. I put that aside while I took a white card base and stamped a design in each corner and a sentiment from the Altenew Dot Art stamp set. The ink pad used was Altenew Persian Blue Crisp Ink. I then popped up the die cut flowers and finished by adding some blue rhinestones from my stash.


I hope you enjoyed my little creative adventure from this afternoon. I know I did. Take care everyone and thanks for coming by and leaving such uplifting comments always.

God bless, Verna

Fluttering By

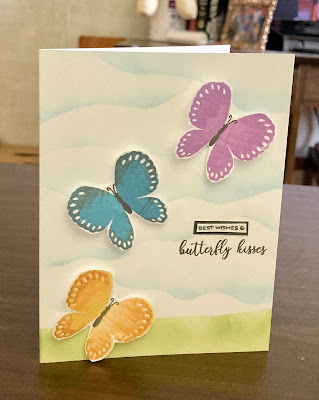
 First of all I want to wish all my Canadian friends a Happy Canada Day! I hope your day is extra special. This card I am showing uses an Al...