Tuesday, November 1, 2016

Foiled Again!

I am so excited as I found a way I can foil without going out and buying a new printer and laminating machine. I used double sided sticky paper, dies and Scor Tape to have the foil work it's magic. And, from trial and error I finally figured out which side to add to the sticky surface. It is the non colored side that worked for me but then my foiling papers are very old. They originally were meant to use with a hot pen which I don't have. They were in a bargain bin years ago and I thought they looked cool and purchased them not realizing I needed certain tools for them to work. But with this method I can use them.


The dies I used are from Cheery Lynn Designs. I cut them out of the double sided sticky paper which I got from Sparkle N Sprinkle and peeled off one of the layers and then added it to the card base of Gina K. Designs Cranberry Tart card stock. I had thought I had gold foiling paper in that packet but alas there was none so I went with the multicolored one that had some gold incorporated in it. After I had peeled off the top layer of the dies I then added the foil to it using the dull or non shiny side. You have to burnish it quite a bit and when you feel it is all adhered then peel the foil away. If it does not quite all take, you can add some foil again in that area to finish it off. For this card I used a sentiment from Gina K. Designs Scripty Sayings set and embossed it with gold fine detail embossing powder from Gina K. Designs. The card was finished with adding some yellow rhinestone gems.

Cheery Lynn Designs Die used:
Small Leaves #1 D133

I am entering the first card in the  Cheery Lynn Designs Blog Challenge.The challenge calls for Thanks You cards. And this card will be entered into the Dies R Us Challenge-Thankful for Nature (Thank You or Nature Based).

Well, one more post for today and then the rest of the day will involve more baking for an upcoming bake sale. If I do a little at a time I will have a great array of goodies to sell for the Fall church fund raiser. I hope you have a wonderful day as well.

God bless,
Verna

Grateful Wreath

Welcome to November. Today I got back into the Autumn season and took the wreath die that was meant for Halloween and used it as a card of thanks. This would also be a wonderful way to make a Thanksgiving card too. I hope you like my simple design.


My card base is of Gina K. Designs Ivory and I die cut the wreath out of Gina K. Designs Dark Chocolate card stock. My leaves were die cut from a sheet of Ivory that I added various shades of ink to make my leaves look more the colors of Autumn.

I glued the wreath onto the base card with a 2-way glue pen and then did the same with all the leaves that I had die cut. Inside the wreath I stamped the sentiment. And on the bottom I added a chiffon brown ribbon with a double loop bow.

This panel was added to some Gina K. Design orange two-toned striped pattern paper before it was added to the main card. I also took a white gel pen and added a bit of coloring to the bird to make him look a bit more realistic.


Cheery Lynn Dies used:
Happy Halloween Twiggy Wreath B469
Flourish Leaf Strip B178

Stamp set used:
Joy Clair CLR-01009 Hello Autumn

My bow was made using the Craft-Dee BowZ bow maker. The sentiment was added with Gina K. Design Warm Cocoa dye ink.

I am entering this in the following challenges:
Cheery Lynn Designs Challenge #241-Thank You Theme
Dies R Us Challenge-Thankful for Nature (Thank You or Nature Based)

I hope you had a great Halloween experience. Ours was quiet with no trick or treaters at all. But we watched some cool things on TV and still got the spooky experience. Thanks for stopping by and for the wonderful comments too.

God bless,
Verna


Saturday, October 29, 2016

Stickeroo Cards

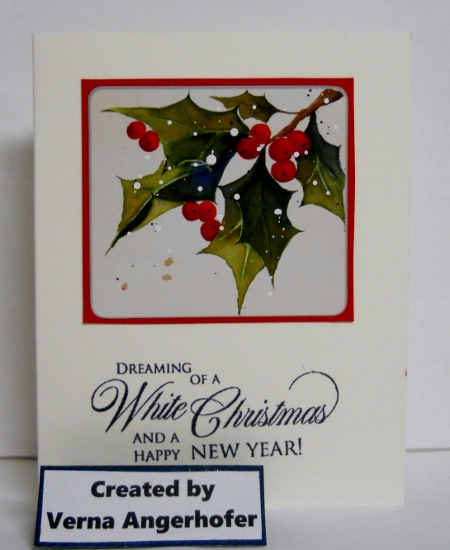
Today I did a bit of cheating to get five cards done using Penny Black Stickeroos. They are beautifully colored stickers and I tried to add them to cards with a bit of extra embellishment or layering to make them appear a bit more handmade. They are so beautiful and the coloring on them is wonderful.


Here is the photo of the stickers I used. Just click on the link. This set is called Berry Delight. But for the life of me I cannot figure out how a pear is a Christmas image. But it was one of the stickers in the set so I figured they knew more then I did. LOL Edited: I found this on the internet so now I understand why it was considered a Christmas symbol. Pear: The pear symbolizes Christ's love for mankind.

And I used a Penny Black sentiment stamp set called Yuletide Wishes. Here is the link for that too. I think these sentiments have the most beautiful font and wonderful verses in them. I just had to have them for my Christmas card designs.


I love the bright colors of these stickers and I knew I would be needing to get lots of cards finished by Thanksgiving or even earlier and so I opted to try this. Some of them I added extra specks of white with acrylic paint mixed with water to simulate snow. Others I just layered onto coordinating card stock. A couple used shimmery copper colored card stock and I added gems and copper nail heads to most of them. So far I have done 15 cards using these stickers and I have one more sheet to work with. I hope you enjoyed looking at them. And, even though I cheated I still think they worked into lovely card designs.

Well, I hope your Saturday was a good one. Ours was a rainy one so that was the reason I got to work on cards once again. It was a fun project too. Have a great rest and a good Sunday my friends. Thanks for stopping by.

God bless,
Verna


Friday, October 28, 2016

Christmas Vest

Another card along the sweater and stocking theme is this one which is using a template using a vest. I really am enjoying the Freebie templates at Stamp TV and making great  use of them along with the wonderful Stamp TV set called Nordic Winter illustrated by Claire Brennan.


I chose to use mainly Ivory, Christmas Pine and Kraft card stock from Gina K. Designs. I also used the Christmas Pine, Black and Red Velvet inks from Gina K. Designs.

I computer printed the vest template onto Ivory card stock and then proceeded to stamp my design on the vest. Once that was done I fussy cut it out and pieced it over the bottom template. I finished the vest by adding some light brown lines around the bottom, neck and sleeves. I then laid this aside while I made my background design.

The background was done with black ink and I stamped the design onto the kraft paper. The card base is of Christmas Pine card stock and onto that base I added the kraft panel. But before I layered it I took some ribbon from the Christmas Collection from Really Reasonable Ribbon and placed that on the left hand side.


I also added a kraft panel inside the card to which I stamped the same border design along the bottom. Kraft is light enough so that the black ink shows well and I love using Kraft on card designs all year long.

Well, this will be entered in the Mix It Up Monday Challenge at Stamp TV. In that challenge we were to use just a pop of red. So my red reindeer design on the vest should make it a qualifying entry.

Well, our sun they said we were to see today so far has not appeared. And, that is bad news for anyone wanting to combine corn. We are in a crunch time frame here too as there are only a few days before hubby has to have his cataract surgery and that means he can't get into a dusty situation and combining is certainly that type of situation. Hopefully, he will be able to finish it before as I know that would be a big relief to both of us.

Well, have a great weekend. It is hard to believe another week has just sped by again. Thanks for always leaving such wonderful comments too. I love them.

God bless,
Verna

Thursday, October 27, 2016

Halloween Treat Bag

My biggest problem with making Halloween Treat bags is that I have to sample the treats while doing so. But I sure enjoyed the treats along with the making of this easy and simple design.


I simply took a sandwich bag and cut off the top and added the treats. Then with Cheery Lynn Designs oval dies I made the topper base with orange card stock layered onto black. Using my Scor Pal I embossed down the middle and folded it over. I stamped the  sentiment on the orange layer with Gina K. Designs black ink. Next I stamped the cat in the moon image onto white card stock with the black ink and colored it in with my Bic Mark-It pens. After fussy cutting out the moon/cat image I added it to the topper. All that was left to do then was to staple it on the treat bag.

Couldn't be easier. And, with limited time these days I am glad it did not take so long.

Cheery Lynn Dies used:
XM-7 Oval Classic
XM-9 Oval Inverted Scallop

Stamp set used:
Sparkle N Sprinkle Plate 00-335P4-HALLOWEEN-RIP

I am entering this in the following challenges:
Mod Squad Blog Challenge-Halloween Fun
Scrapy Land Blog Challenge #52-Halloween

I will spend part of Halloween Day getting a mammogram. I want to remind all of you that this is very important to do even it may not be the most pleasant thing. So check those girls out ladies!

Thanks for stopping in and hope your day is going well.

God bless,
Verna
Sunday, October 23, 2016

Christmas Stocking

I made another clean and simple card using the freebie templates from Claire Brennan which are available at the Stamp TV site. This time I chose to use the stocking template and I used the PDF form to make mine. Simply download the templates to your computer and print them out. I also used the Gina K. Designs Nordic Winter set which is illustrated by Claire. Also on the print out is a pattern for a vest which I might choose to use for another card some time.


The colors I used were Christmas Pine and Red Velvet ink from Gina K. Designs. I also used Christmas Pine and Ivory card stock from Gina K. Designs. The toe, heel and upper part of the stocking were colored with Bic Mark-It pens. Inside the card I added the Ivory panel on which I stamped the border design in the green. I used a brad to fasten the stocking to the sentiment panel.


I sure hope whoever gets this card will hang their stocking up so that Santa can fill it too. I think this is a really cute template and I thank Claire so much for being so gracious as to give the members of Stamp TV this little freebie. I know I am enjoying it very much.

Well, I hope your Sunday went well. I started my day out at church and then this afternoon I was busy writing cards to people and tracking down addresses. But I finally got that task done and that was when I decided to make this card. I really had fun too so my Sunday was a great one.

Thanks for looking and for the wonderful comments.

God bless,
Verna

Saturday, October 22, 2016

Reindeer Sweater

Today I again worked with the free sweater template that Claire Brennan so nicely added to the Freebies section on Stamp TV in SVG and PDF forms. I am a PDF user so it involved some fussy cutting on my part but I just love the wonderful sweater designs one can make using the Gina K. Designs Nordic Winter set illustrated by Claire Brennan. For my card I also used a sentiment from the Gina K. Designs Warm Woolen Mittens set by Rebecca Oehlers. The Warm Woolen Mittens set is no longer available as it is retired.


The sweater design was stamped with Gina K. Designs Red Velvet ink. I think that is the prettiest red ink I have seen in a long time. I had to find a similar color to do the bands on the sweater at the collar and the cuff so I went this time to my Zig water color markers. And over the top of the water color inks I made a ribbed look with an extra fine point Bic Mark-It red pen. I thought about leaving the cuffs and collar white but had no idea how to make the ribs in them so I stuck with the red.

This time I chose to use some plaid pattern paper which reminded me of flannel. I figured it would fit in with the warm wishes design. This  paper is from the Stampin' Up! Warmth & Cheer Designer papers. This pattern paper was added to the Gina K. Designs Red Velvet card stock card base and then over that I added the sweater and the sentiment by popping them up with Zots.


I finished the card by adding a white panel inside on which I had stamped the stitched heart design all along the bottom.

I am entering this in the Double D's Blog Challenge in which they ask people to use plaid in their projects. I think this will qualify.


Well that was a fun project again and it really doesn't take so long once you figure out how to do the design. I remember seeing deer on a lot of Nordic styled sweaters in the past so I figured I would make one on this sweater too. Sure wish I could crochet or knit ones like this for real, but for now this is the way I will make mine.

Well, I hope your Saturday is going well. Thanks for stopping in and for all your wonderful comments.

God bless,
Verna

Fluttering By

 First of all I want to wish all my Canadian friends a Happy Canada Day! I hope your day is extra special. This card I am showing uses an Al...