Saturday, October 24, 2015

Red & Gold Floral

The Mix It Up Monday challenge at Gina K. Designs is to use red and gold in your artwork. I had some free time today so decided I would work up a design for this challenge.


I used the Gina K. Designs Simply The Best stamp set and the gold embossing powder was from Gina K. Designs also. I fussy cut the gold embossed big flower to add to the awesome flourish embossed in gold on the white panel.

I added a faux ribbon accent by using Allison's Ribbons die which is made by Cheery Lynn Designs. The larger was die cut from Cheery Red card stock and the smaller inside portion was die cut in white and then with Versamark ink and gold embossing powder I heat set it to make it gold.

Each panel was cut from a Memory Box Cross Stitched Borders die before I layered them onto the white card stock base. My card was finished with the addition of the sentiment and some red rhinestones.

Thanks for stopping by and hope your Saturday is going great!

God bless,
Verna

Friday, October 23, 2015

Flip Flop

Today's card is one I started on last night when I saw the email from the Mod Squad Challenge Blog which stated the challenge for this week. I am telling you this is a CHALLENGE but I hope I managed to pull it off by using a heart image and making it into a line of evergreen trees and using them in a scene. All stamps used are from Kitchen Sink Stamps too.


Besides using the stamps I also found these cute little snowmen yesterday when in town which are from Jolee's. I thought they would be a cute snow couple to dress up my card. I also used white pigment ink and added that to the snowy portion and then added some white embossing powder from Sparkle N Sprinkle which had some glitter with it. So my snow sparkles in person but not sure you can see it on the photo.

The sky was sponged in with a light blue dye ink and all other stamped images and sentiments were done with dye ink as well.

Stamps sets from Kitchen Sink Stamps used are:
Multi Step "Sweetheart Roses" MINI 011
Multi Step "Tree Friends" MINI 020
Greetings From The Woods SMC 041

Well, since I am into Christmas and winter designs I had to make it in that theme. I think it turned out quite well myself. No snow here but we are getting much needed rain, so that is good.

Hope your day is going well!

God bless,
Verna

Thursday, October 22, 2015

Christmas Town

I had to join in on the Scrapy Land Challenge again and work with some of the many brands of dies they sell on their site. The challenge was to use dies and either dry or heat embossing. I went with the dry embossing.


I used the Cuttlebug Winter House embossing folder on white card stock and with Bic Mark-It Ultra Fine markers I colored in the design. I then cut that panel out with a Memory Box Frame Die and layered it onto a panel of Christmas Pine card stock which was also cut with the same frame die but in a larger size. I placed this onto the lower right corner of my Cherry Red card base.

Next I took another Memory Box Die and cut the snowy borders with white card stock to add to the red card. After they were  added I then added some white pearls to the design and also added a green ribbon bow. The sentiment which I used is from the Gina K. Designs Winter Blocks stamp set which is illustrated by Tami Mayberry.


Memory Box Dies:
Frosty Border Style No. 98171
Cross Stitched Frame Borders Style. No. 99124

I thought this might be how Santa's home might look at the North Pole so that was why I named it Christmas Town.

Well, it sounds as if rain is in the forecast. I am thankful we have the corn all combined now and if it rains we can just sit back and rest. We need the rain too!

God bless,
Verna

Sunday, October 18, 2015

Ho Ho Ho!

One has to use Santa in a Christmas card too I think. Santa was just stamped on white card stock with Gina K. Designs Cranberry Tart dye ink and then layered onto Cranberry Tart card stock before I added it to a die cut frame.

To make the frame I took some silver plain pipe repair tape to see if it would work as well as the Duck tape I used for my last blog post. Well, here is the low down on that. It does not work as well as it is a heavier tape. I placed three strips of it onto a card stock panel so that I would have a large enough surface to die cut the frame. I took some Tim Holtz Mushroom Alcohol Ink and rubbed it all over the surface to give it an old vintage look to the metallic surface.

Now normally when you die cut the frame all the pieces fall out or are cut through. Well, luckily all that cut this time was just the outside edges, except for three pieces which fell out. I decided I liked the look even better this way as it was more of an embossed look. So I simply glued in the three pieces that fell out and used it that way on my card base of Cranberry Tart.


A very clean and simple design but I really am pleased with the way it turned out. I added a piece of white card stock inside to have a surface to stamp an inside verse and write a message.

The Santa is from Stampitcrazy,net. It is a nicely etched Santa and instead of coloring it in I simply stamped it in the Cranberry Tart ink. If you are looking for vintage style Santas she has several to choose from.

The only die  used was the Cheery Lynn Japanese Lace & Flourish Frame DL137. I am going to enter this in this week's Cheery Lynn Designs challenge which calls for a vintage theme.

Well, it is a beautiful Sunday here with lots of sunshine and wind.  Many leaves are falling off now and the colors of Autumn are wonderful too.

I hope you are having a great day and thanks for stopping by and commenting. I appreciate every one of them.

God bless,
Verna

Friday, October 16, 2015

Duck Tape Christmas

For the wedding last month I wanted to cover up all the advertising on my cane so I bought a roll of fancy duck tape and wrapped it over the offending advertising. Yesterday I was looking at that tape and wondering if it would work to make a card with it. I decided to try using it for die cutting. It did work well and I am very pleased with how the card looks too. **Note: Duck Tape and not Duct Tape**


In order to make the tree I had to lay down two sections of the tape on card stock before I cut it out. I then used glue to add it to the red card stock. But the snowflake border worked well just the way it was on a single piece of tape so all I had to do was take the backing off after die cutting and place it on my card stock. That sure was easy. Here is a photo of the tape on a roll.


The sentiment is from the Gina K. Designs Stately Flowers 5 set. I just love the font of that greeting.

After adding all the layers onto the white card base I cut a thin strip of the tape twice so that I could put just a hint of it along the outside of the red layer. I thought it gave it a more finished look.

Dies used: 
Memory Box Frosty Border Style No. 98171
Die-Namites "Winter Fir" DN-1117

I think this will qualify for the Mod Squad Blog Challenge this week too, so I am going share my card there as well.

Have a great weekend. I love all the great comments you leave.

God bless,
Verna


Wednesday, October 14, 2015

PEACE

Here is a scenic card I made with a combination of die cuts and some stamps. I also used Tim Holtz Distressed Inks and a white gel pen.


I took two panels of white card stock and the one I inked all over with Tim Holtz Chipped Sapphire Distress ink for the sky and the other one I inked up with Tim Holtz Stormy Sky Distressed ink for the snowy part. I let them dry for awhile and then took the heat gun to speed up the process.

I took the Stormy Sky panel and then using a Spellbinder A2 Curved Borders One set cut the wavy line for the snow. I set this aside until I could add the tree which is a die from Die-Namites to which I added some white from a gel pen. This was glued to the sky panel.

Now I was ready to add the snowy line and I adhered the two panels together. I was then ready to cut the scene out with the Memory Box Cross Stitched Frame Borders die. In the sky portion I added a bit of white dots from the gel pen to make the stars. In the snowy bottom I added a deer from Stampscapes. I then added this completed panel to the white base card. My final thing to do was to stamp the PEACE which is also from Stampscapes with the Chipped Sapphire ink. I then took the Memory Box cross stitched smallest die and cut it out and then popped it on the completed card.

I am entering this in the Mod Squad Blog Challenge for this week and the theme is Winter & a Die.

Well, I missed out on any card making yesterday since I was busy freezing carrots from the garden. I have about one third of the crop frozen and from that I got 12 pints. With the big crop of carrots we are getting this year I figured I best spread it out over a few days. That was enough washing, peeling and slicing for me to do in one day. And, then I still had to blanch, cool and bag them. So it was a busy day for me.

I hope the week is going well for you. Thanks for the nice comments and for stopping in to see my projects.

God bless,
Verna

Monday, October 12, 2015

Happy Thanksgiving Canada!

For all my friends in Canada I created a card which I thought might let you know that I count you as one of my greatest blessings too! Happy Thanksgiving Day Canadian style!


I used pattern paper from Gina K. Designs and also a sentiment from her line of stamps. The oval dies are from Cheery Lynn Designs as are the larger rectangle dies and the leaves. Some of the leaves were cut from white card stock to which I had added various shades of Fall colors. And, the rest were cut from plain card stock. After layering everything together I finished the card off with a black bow.
I forgot to add I put some little orange and yellow gems on the oval layer with the sentiment. Not sure where they came from or who made them but they seemed perfect to me.

Supplies are listed below if you want to check into them.

Pattern paper:
Gina K. Designs Grateful Heart pack

Sentiment:
Gina K. Designs Stately Flowers 5 illustrated by Melanie Muenchinger

Cheery Lynn Dies:
Card Maker's Stacker's Nesting Dies A2 size ST 014
Oval-Classic Stacker's Nesting Dies XM-7
Oval-Inverted Scallop Stacker's Nesting Dies XM-9
Small Leaves #1 D133

I am entering this in the Cheery Lynn Designs Challenge for this week which is to use black and orange.

I hope my Canadian and friends all over the world are having a wonderful day. Thanks for being there for me.

God bless,
Verna

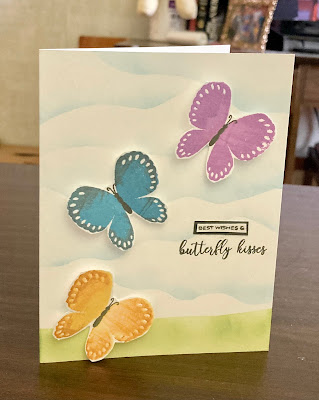
Fluttering By

 First of all I want to wish all my Canadian friends a Happy Canada Day! I hope your day is extra special. This card I am showing uses an Al...