I have been so fortunate to win lots of different crafting supplies over the years of my card making career and one thing I won that I had not used up yet was some blank ivory note cards. So this year I decided to use them for my own personal stash of cards. And, again I went with a fairly clean and simple look. And, having the MISTI certainly helped me align up the wreath and the berries correctly too. I used it for adding the sentiment as well. On a separate piece of ivory card stock I used my new MISTI tool for stamping multiples of the deer by just rotating the paper.
I think the hardest thing about creating this card was making the tiny bow with arthritic fingers and fussy cutting out the deer. And, I used up some leftover plaid ribbon that I had won in a grab bag to decorate the card. One could use left over pattern paper easily enough too, but I just adored this ribbon so wanted to add it to this particular one. I simply took a tape runner and ran it along the underside of the ribbon and adhered it to the borders of the front panel.
I used Gina K. Designs images from the Poster Board Christmas set by Rebecca Oehlers. The deer image was from another set from Gina K. Designs called Season's Greetings. Ink colors used were Gina K. Designs Christmas Pine, Warm Cocoa and Cherry Red. My little bow was made with my Craft-Dee Bowz bow making tool.
I am all set up to make five of this design. All that is left is to assemble them. Hopefully, by the end of the day I can have many more cards done for my holiday sending which I usually start to do shortly after Thanksgiving. That way I have plenty of time to do other holiday activities. I am quite a ways from my goal yet though, so look for more Christmas cards in the future on my blog.
This card will be entered into the Stamp TV Mix It Up Monday challenge and also in the Mod Squad Challenge for this week which is to make your favorite type of card. By now I am sure many of you know that I prefer clean and simple.
Thanks for looking and have a great day. It is a beautiful one here in South Dakota with lots of sunshine after our rains of yesterday.
God bless,
Verna
This blog is about my card making, but now and then I might add a few other things as well. Please read the Privacy Policy at the top of my blog. Also any handmade items I display are mine exclusively and so therefore do not publish them as your own without my permission. I would be honored though if you would like to CASE, Like or Pin them and give me the credit.
Thursday, October 23, 2014
Wednesday, October 22, 2014
Sequins in the Sky! Santa's Coming!
I worked up another clean and simple card design for Christmas giving. To this scene I added some of the home made sequins again to make it look like a starry Christmas Eve.
The Santa and Sleigh image is from Gina K. Designs Poster Board Greetings set by Rebecca Oehlers. And, the trees are from the Gina K. Designs The Northwoods set by Theresa Momber. I sponged on two shades of blue to make the sky. Then I simply stamped the images in black ink. My sequins were made from haliographic paper and this time I used two different sizes of sequins. I added a ribbon from American Crafts which had a Merry Christmas already on it before I layered it to the white base card.
I love to create clean and simple cards. And, I think that Santa and Sleigh work so well for Christmas greeting cards.
This card will be included in the Stamp TV Mix It Up Monday Challenge and also in the Mod Squad Challenge as well.
Thanks for stopping by. I so appreciate it.
God bless,
Verna
The Santa and Sleigh image is from Gina K. Designs Poster Board Greetings set by Rebecca Oehlers. And, the trees are from the Gina K. Designs The Northwoods set by Theresa Momber. I sponged on two shades of blue to make the sky. Then I simply stamped the images in black ink. My sequins were made from haliographic paper and this time I used two different sizes of sequins. I added a ribbon from American Crafts which had a Merry Christmas already on it before I layered it to the white base card.
I love to create clean and simple cards. And, I think that Santa and Sleigh work so well for Christmas greeting cards.
This card will be included in the Stamp TV Mix It Up Monday Challenge and also in the Mod Squad Challenge as well.
Thanks for stopping by. I so appreciate it.
God bless,
Verna
Tuesday, October 21, 2014
Poinsettia Frame
Today I had to do some baking so I only managed to get one card done for my Christmas supply. I think I will enter this into the Mix It Up Monday Challenge at Stamp TV for this week in which we were to make a Christmas card.
For this card I chose the lovely Festive Frame set from Gina K. Designs which is illustrated by Melanie Muenchinger. I stamped it with Momentos Black ink and then colored it in with the Spectrum Noir Markers. Over the top of the panel I applied a good coating of Versamark ink and sprinkled on clear embossing powder. After I heat set this the panel really shimmered. I also think it makes the colors more vibrant too. The photo below shows that shimmer.
I layered the panel onto a layer of Gina K. Designs Red Hot card stock and then onto the base card of Gina K. Designs Pure Luxury Ivory card stock. My card was finished by adding a double ribbon bow of Honey Mustard organza.
Well, thanks for looking and I hope all of you had a wonderful day.
God bless,
Verna
For this card I chose the lovely Festive Frame set from Gina K. Designs which is illustrated by Melanie Muenchinger. I stamped it with Momentos Black ink and then colored it in with the Spectrum Noir Markers. Over the top of the panel I applied a good coating of Versamark ink and sprinkled on clear embossing powder. After I heat set this the panel really shimmered. I also think it makes the colors more vibrant too. The photo below shows that shimmer.
I layered the panel onto a layer of Gina K. Designs Red Hot card stock and then onto the base card of Gina K. Designs Pure Luxury Ivory card stock. My card was finished by adding a double ribbon bow of Honey Mustard organza.
Well, thanks for looking and I hope all of you had a wonderful day.
God bless,
Verna
Monday, October 20, 2014
Do It Yourself Sequins
I recently saw a video on the internet which showed how to make your own sequins. I had to try it myself. You can see the video here: DIY Sequins. One of the members at Stamp TV linked us to this video and I am thrilled. I made a simple card design and dressed it up with my sequins I made from Haliographic Mirror card stock. That paper picks up colors from it's surroundings too so it is very versatile and works with many projects.
I happened to have some mirror card stock on hand so I knew as soon as I found the time I wanted to try this technique out. I think it is so cool! My images are from Gina K. Designs as are the inks. I have lots of music and guitar lovers in my family so I know this card will be a great collection to my own stash of cards.
I hope you can view the video and find ways of making your own sequins. It is a great way to use up scraps and save money too!
Thanks for stopping by and hope your day is wonderful!
God bless,
Verna
I happened to have some mirror card stock on hand so I knew as soon as I found the time I wanted to try this technique out. I think it is so cool! My images are from Gina K. Designs as are the inks. I have lots of music and guitar lovers in my family so I know this card will be a great collection to my own stash of cards.
I hope you can view the video and find ways of making your own sequins. It is a great way to use up scraps and save money too!
Thanks for stopping by and hope your day is wonderful!
God bless,
Verna
Sunday, October 19, 2014
Grow Old With Me
Forty-five years ago I married my soul mate, the love of my life. Sure seems like it should not be that long ago, but that's the truth! LOL And, here we are with four children and five grandchildren later. For the most part we have had a great life together and have been truly blessed.
It wasn't until I saw pictures of him as a little boy that I realized we had seen each other early on in life when we were 10 and 8 years old. We both were visiting my cousin, Jim, who was in the hospital.
It was many years later when we met up again and this time he was with another girl. Oh, I thought she was so lucky. I even told my sister Alice that I hoped that some day I could meet up with him again and marry him or at least find someone else very much like him. He was such a nice young man.
But the timing was not right! It took a couple more years before I saw him again. He was home on leave from the Air Force and I recognized him. So with a burst of courage I went over to him and said "Hello".
He remembered me but did not remember my first name. But he said, "I know you! You are the Brandt girl who drives the blue Ford with a streak of dust behind it." LOL So apparently I made some sort of impression on him.
That was the start of our courtship. We dated for the six weeks leave he had and when he left again for the Philippines and a short stint in Viet Nam we kept up the romance via letters. I wrote him every day. He wrote as often as he could too. In fact, his sister used to look me up on my noon break from work to find out the latest news about her brother. They only got a few letters whereas I had many more. And, those letters meant the world to both of us. I used to read his over and over again until the next one arrived.
When he came home in February of 1969 we kept dating and in June of that same year he proposed to me on my birthday. I was so happy and of course, I had to say "Yes". Since we both grew up on a farm, we decided that was what we wanted to do as well. So after our wedding on a Sunday afternoon in my home church we took a short honeymoon to the Black Hills and on our return moved onto his family farm. And the rest is history. We have lived there ever since and are still farming too!
So my card I created for him is from the Gina K. Designs stamp set called Farm Life which is illustrated by Theresa Momber. I love that set. I think I used it for a card for him another year, but I still think he will like it.
I used the Spectrum Noir colored pencils to color in this scene. I tried to make it look like early Fall with the grass and the leaves changing colors. And, I just love the sentiment. I thought that a perfect addition to the scene,
We are going to go out for lunch today after church and celebrate. Yipppeeee! I don't have to cook or do dishes!
Thanks for stopping by and hope you did not notice that the Happy Anniversary sort of got a bit crooked. Oh, well! If it were perfect you would not know it was a handmade card, right?
God bless,
Verna
It wasn't until I saw pictures of him as a little boy that I realized we had seen each other early on in life when we were 10 and 8 years old. We both were visiting my cousin, Jim, who was in the hospital.
It was many years later when we met up again and this time he was with another girl. Oh, I thought she was so lucky. I even told my sister Alice that I hoped that some day I could meet up with him again and marry him or at least find someone else very much like him. He was such a nice young man.
But the timing was not right! It took a couple more years before I saw him again. He was home on leave from the Air Force and I recognized him. So with a burst of courage I went over to him and said "Hello".
He remembered me but did not remember my first name. But he said, "I know you! You are the Brandt girl who drives the blue Ford with a streak of dust behind it." LOL So apparently I made some sort of impression on him.
That was the start of our courtship. We dated for the six weeks leave he had and when he left again for the Philippines and a short stint in Viet Nam we kept up the romance via letters. I wrote him every day. He wrote as often as he could too. In fact, his sister used to look me up on my noon break from work to find out the latest news about her brother. They only got a few letters whereas I had many more. And, those letters meant the world to both of us. I used to read his over and over again until the next one arrived.
When he came home in February of 1969 we kept dating and in June of that same year he proposed to me on my birthday. I was so happy and of course, I had to say "Yes". Since we both grew up on a farm, we decided that was what we wanted to do as well. So after our wedding on a Sunday afternoon in my home church we took a short honeymoon to the Black Hills and on our return moved onto his family farm. And the rest is history. We have lived there ever since and are still farming too!
So my card I created for him is from the Gina K. Designs stamp set called Farm Life which is illustrated by Theresa Momber. I love that set. I think I used it for a card for him another year, but I still think he will like it.
I used the Spectrum Noir colored pencils to color in this scene. I tried to make it look like early Fall with the grass and the leaves changing colors. And, I just love the sentiment. I thought that a perfect addition to the scene,
We are going to go out for lunch today after church and celebrate. Yipppeeee! I don't have to cook or do dishes!
Thanks for stopping by and hope you did not notice that the Happy Anniversary sort of got a bit crooked. Oh, well! If it were perfect you would not know it was a handmade card, right?
God bless,
Verna
Friday, October 17, 2014
Recessed Frame Card
Today I decided to get back to creating Thanksgiving cards. Or should I say one. LOL I seem to take more time and put more effort into things these days, but maybe that is okay too! At any rate I do like my card I created.
Again I went for a fairly clean and simple card but making a recessed frame took me lots longer than I thought it would as I could not find an oval die that would exactly fit my frame so I did the best I could with my best fitting one. It is a Spellbinder die. It was a little longer and not as plump as the frame but I think it doesn't look too bad.
I used Gina K. Luxury Ivory, Tomato Soup and Dark Chocolate card stock. Yummy! That sounds like a good meal to me for a cold and windy day such as we are experiencing. LOL
The stamps I used are from the Gina K. Designs The Simple Things TV Kit which includes the The Bounty of Blessings and The Simple Things stamp sets.
I stamped the pumpkin in the center of a piece of Ivory card stock with Gina K, Designs Dark Chocolate dye ink. I then colored it with Spectrum Noir markers and placed it behind the top panel of Tomato Soup card stock using some pop dots so that the pumpkin image was recessed. My frame was stamped with Dark Chocolate ink also.
I am so glad I have a Misti now as the first stamping of that frame was not completely covered, But now if I use the Misti, it is not a problem. All I did was ink it up again and restamp and this time I got every inch covered. I also did the same thing with the sentiment so that I had a nice dark stamping in the Dark Chocolate ink. That Misti perfectly aligns my images so I don't have a problem eyeballing and it also eliminates the use of a stamp positioner.
I added some Tomato Soup twine to the Tomato Soup card stock panel and over that placed a little sunflower from Jolees By You from EK Success. I added the black pearl to the sunflower too. The card was completed by adhering it to the base panel of Dark Chocolate card stock and inside I lined it with some Ivory card stock to which I stamped another pumpkin image in the lower left corner along with an inside sentiment.
I am entering this card in the Stamp TV Release Party challenge in which we were to make a recessed frame on our card. I think this was really easy to do too except for the time spent searching for a die.
Thanks for looking and I so appreciate all the comments you leave too. Have a great weekend!
God bless,
Verna
Again I went for a fairly clean and simple card but making a recessed frame took me lots longer than I thought it would as I could not find an oval die that would exactly fit my frame so I did the best I could with my best fitting one. It is a Spellbinder die. It was a little longer and not as plump as the frame but I think it doesn't look too bad.
I used Gina K. Luxury Ivory, Tomato Soup and Dark Chocolate card stock. Yummy! That sounds like a good meal to me for a cold and windy day such as we are experiencing. LOL
The stamps I used are from the Gina K. Designs The Simple Things TV Kit which includes the The Bounty of Blessings and The Simple Things stamp sets.
I stamped the pumpkin in the center of a piece of Ivory card stock with Gina K, Designs Dark Chocolate dye ink. I then colored it with Spectrum Noir markers and placed it behind the top panel of Tomato Soup card stock using some pop dots so that the pumpkin image was recessed. My frame was stamped with Dark Chocolate ink also.
I am so glad I have a Misti now as the first stamping of that frame was not completely covered, But now if I use the Misti, it is not a problem. All I did was ink it up again and restamp and this time I got every inch covered. I also did the same thing with the sentiment so that I had a nice dark stamping in the Dark Chocolate ink. That Misti perfectly aligns my images so I don't have a problem eyeballing and it also eliminates the use of a stamp positioner.
I added some Tomato Soup twine to the Tomato Soup card stock panel and over that placed a little sunflower from Jolees By You from EK Success. I added the black pearl to the sunflower too. The card was completed by adhering it to the base panel of Dark Chocolate card stock and inside I lined it with some Ivory card stock to which I stamped another pumpkin image in the lower left corner along with an inside sentiment.
I am entering this card in the Stamp TV Release Party challenge in which we were to make a recessed frame on our card. I think this was really easy to do too except for the time spent searching for a die.
Thanks for looking and I so appreciate all the comments you leave too. Have a great weekend!
God bless,
Verna
Thursday, October 16, 2014
Misti for Making Cards
I was so happy when my Misti arrived in the mail today. That stands for Most Incredible Stamping Tool Invented. And, you can find them at My Sweet Petunia. In the upper top there are various links to learn about it. And, since she makes all her own right now, she sells out fast as there are limited supplies. But soon she is hoping to be making them more readily available as she is working on contracting a company to do them for her. To find out when she has more on hand, either join her Facebook page or get her blog through email.
Here is what a Misti looks like.
And with this tool I managed to make five Christmas cards in just a short span of time. In fact, less then 30 minutes once I had my design figured out and all my supplies on hand. I used some older stamps I had from Posh Impressions and inked them up with the Momento Dew Drop pads. I added some ribbon and then layered my design on pine green card stock. My card base is white so I did not have to add a liner to it. A few little red rhinestones were added to the holly and the holly in the sentiment as well.
I got the message that Operation Write Home was in short supply of Christmas cards and that they extended the deadline. They wanted people to send in at least five cards to take care of the small shortfall for this season. So I decided to try this method. I think it took me longer to get the cards ready for mailing then it did to create them.
I know that this will be a great tool to own. What makes me so happy is that once you have your design ready to stamp, if a bad impression takes place, you can re-ink it and stamp again and it will land right in the same place on the card stock. No more trying to eyeball it or use a stamp positioner.
I recommend you check Misti out and see for yourself what an awesome tool this could be. I know I am happy with it and plan to use it over and over. There are many videos available on different ways of using it as well. I know for me it will be awesome to have for stamping backgrounds. With my arthritis sometimes I tend to not get a good impression, but no worry now! I can always do it again and make it work. This should save a lot of wasted card stock for me.
Thanks for looking and I hope you enjoyed seeing my quick and easy card too.
God bless,
Verna
Here is what a Misti looks like.
And with this tool I managed to make five Christmas cards in just a short span of time. In fact, less then 30 minutes once I had my design figured out and all my supplies on hand. I used some older stamps I had from Posh Impressions and inked them up with the Momento Dew Drop pads. I added some ribbon and then layered my design on pine green card stock. My card base is white so I did not have to add a liner to it. A few little red rhinestones were added to the holly and the holly in the sentiment as well.
I got the message that Operation Write Home was in short supply of Christmas cards and that they extended the deadline. They wanted people to send in at least five cards to take care of the small shortfall for this season. So I decided to try this method. I think it took me longer to get the cards ready for mailing then it did to create them.
I know that this will be a great tool to own. What makes me so happy is that once you have your design ready to stamp, if a bad impression takes place, you can re-ink it and stamp again and it will land right in the same place on the card stock. No more trying to eyeball it or use a stamp positioner.
I recommend you check Misti out and see for yourself what an awesome tool this could be. I know I am happy with it and plan to use it over and over. There are many videos available on different ways of using it as well. I know for me it will be awesome to have for stamping backgrounds. With my arthritis sometimes I tend to not get a good impression, but no worry now! I can always do it again and make it work. This should save a lot of wasted card stock for me.
Thanks for looking and I hope you enjoyed seeing my quick and easy card too.
God bless,
Verna
Subscribe to:
Posts (Atom)
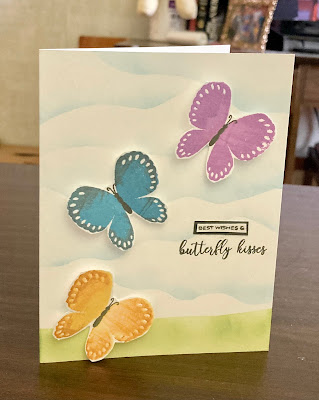
Fluttering By
First of all I want to wish all my Canadian friends a Happy Canada Day! I hope your day is extra special. This card I am showing uses an Al...
-
I had to make a card using a coffee theme today as it is my favorite beverage. Even in summer. I even like iced coffee! So with that in mind...
-
Well, I am so happy that I tried something other then a card for this 2017 Winter Coffee Blog hop . It took a bit of learning to do it but I...
-
For my final card for the 2017 Summer Coffee Lovers Hop I thought it only fitting to make one with a more patriotic theme in celebration of...